Photoshop教程-网格字
2022-12-25 13:38:29
来源/作者: /
己有:6人学习过
Photoshop教程-网格字


1、新建RGB文件[300宽*300高],按‘T’输入文字,颜色自定;本例用的字体是Arial Black,大小250Pixel,弹出右键菜单,选Render Layer。
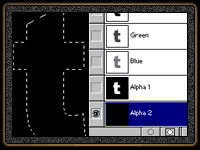
2、按住Ctrl单击文字层出现选区,点击通道[Channel]标签,点下面Save selection as channel按钮把选区存入Alpha 1通道,再点新建按钮建立Alpha 2,如图。
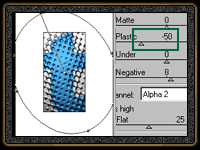
3、按Ctrl Alt D[12]羽化选区,填入100%的白色:Edit-Fill[100%、White];取消选区,执行滤镜:Filter-PixelateColor Halftone,按默认参数确定。
4、回到层面板,调入文字选区,缩小[3-4]个像素:由文字大小而定。
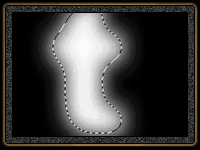
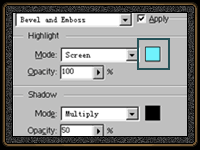
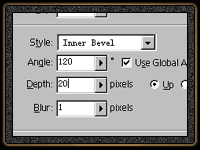
5、使用滤镜:Filter-Render-Lighting Effects,除绿色线圈住的参数和下面设置其它按默认值,确定后效果见左图。
上一篇:PS利用素材打造阳刚木纹字效果
相关推荐

Photoshop去水印简单教程

去除地上的杂物教程

PS婚纱照抠图换背景详细入门教程

Photoshop抠图教程:通道抠林志铃

彩绘艺术字, PS液化工具制作彩绘背景设计教程

Photoshop制作非常流行的金沙立体字,细腻的金沙字体,金粉字。

Photoshop制作金色的海报标题文字教程

Photoshop使用笔刷制作书法艺术字教程


